
By now you might be asking deep inside what is Google’s floating bubble feature, well, the Floating Bubble feature is an improved way of notifying incoming calls.
For people with the latest version of the Android operating system, calls are being notified by a block on the uppermost part of the screen.
It usually stops whatever task you are performing. I agree it’s better compared to the dialer’s previous versions where the incoming call screen would replace your ongoing task. But it is startling and frustrating to an extent.
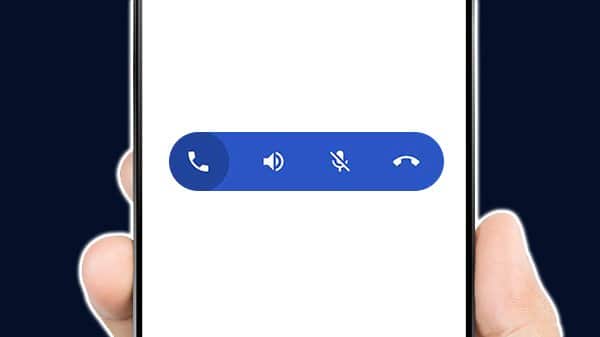
With Google’s new dialer, calls appear as a floating bubble on the screen while tasks are going on and it barely occupy any space on the screen. It lets you continue your task unhindered, and you can even switch between other tasks.
In short, it might be the best step to incoming calls. The bubble also incorporates options for the loudspeaker, mute, and for ending the call, tap on it once to get the toolbar.
How to Enable the Google Dialer Floating Bubble?
Well, it is not a feature per se that you can get through the Play Store, a third-party app, you will need to download it from here.
Download the latest APK file and make sure you are using Android Marshmallow or higher version of the Android operating system as the app only works on these platforms.
Third-party apps need to be permitted by the phone before they can be installed. So to enable:
- Visit Security under Settings menu
- Toggle the ‘Unknown Sources’ options so that it’s activated
Install the downloaded file. Your phone will now have two dialer apps; therefore, if you don’t want to change the default app, you won’t be able to access the newly installed one.
To do this, follow the steps below:
- Navigate to the Settings again and open Apps in the menu
- Once you are inside, tap on the gear icon on the top right corner
- You’ll see a list of options, which includes the default app for the phone
- Open it and change it to the newly installed app. you can another step by disabling the system default one
- Finally, go to App Permission in the same page and visit Telephone Permissions. Enable the installed app, thereby permitting it to be drawn over other apps.
Now you’re all set to use the new app. You can also at any time go back to the previous one by enabling it again and changing to the default. But remember that this process is only for non-rooted phones, which majority of users possess.
However, for rooted devices, follow the following steps below after changing the default phone app:
- Open File Manager and head straight to
/data/data/com.google.android.dialer/shared_prefs
- When you are inside, you will find several .xml files, open dialer_phenotype_flags.xml
- You will have to look for G_enable_return_to_call_bubble and then change the value. Originally set as false, edit it and make it true. Then save it
Now you will need to disable it as you did to the default phone app and then restart it
With these, you can now access the Google floating bubble dialer on a rooted device. Press and hold the bubble to obtain a menu to turn on the loudspeaker, mute a call and also to end a call.